Up & Down Wall Light Installation Guide
Our handy visual guide to help you install your new mains-powered wall light.
To proceed, make sure need the following:
Your Fixings
The screws, wall plugs and other accessories are included in your parcel alongside your light(s). If you need some more fixings you can order them online on our website.
Bulbs
The bulb(s) required for your light will be pre-installed in your light.
Screwdrivers
You will need a PZ2 crosshead screwdriver to secure the wall bracket to the wall and a flathead screwdriver to tighten the bolts on the light’s body.
Electric Drill
You’ll need an electric drill to create holes in your wall. Ensure the drill is fully charged and equipped with a 6mm masonry drill bit.
Wire & Wire Cutters
Use this text to share information about your brand with your customers. Describe a product, share announcements, or welcome customers to your store.
The screws, wall plugs and other accessories are included in your parcel alongside your light(s). If you need some more fixings you can order them online on our website.
The bulb(s) required for your light will be pre-installed in your light.
You will need a PZ2 crosshead screwdriver to secure the wall bracket to the wall and a flathead screwdriver to tighten the bolts on the light’s body.
You’ll need an electric drill to create holes in your wall. Ensure the drill is fully charged and equipped with a 6mm masonry drill bit.
Use this text to share information about your brand with your customers. Describe a product, share announcements, or welcome customers to your store.
Important - Isolate the Electrical Supply Before You Begin
To prevent electrocution, always isolate the fuse before working. If you’re unsure, stop and hire a professional electrician to install your outdoor wall light.
Please read these instructions carefully before installation and retain them for future reference.
- Installation Requirements: All fittings must be installed by a qualified person in accordance with local regulations (IET Wiring Regulations BS7671).
- Check Contents: Ensure all listed parts are included in the pack.
- Remove Packaging: Remove all packaging and protective materials from the product before installation.
- Choose Location: Select a suitable location for your light fitting.
- IP44 Rating: The IP44 rating is guaranteed only when the product is correctly installed and sealed.
- Avoid Corrosive Environments: Do not install the product in corrosive environments.
- Installation Orientation: Refer to the installation diagram to ensure the correct orientation of the product.
- Mounting: Securely fix the product to the mounting surface using the supplied screws and wall plugs, which are suitable for masonry only. For other surfaces, additional fixings (not supplied) may be required.
- Drilling Precautions: Take care not to drill into pipes or electrical cables when preparing mounting holes.
- Weight Support: Ensure the chosen fixing point(s) can safely support the full weight of the light fitting.
- Wiring: Follow the terminal markings for wiring and ensure all electrical connections are secure with no loose strands. Do not use the terminal cables to support the product’s weight.
- Troubleshooting: If the light does not work after installation, check for power supply issues and ensure all connections are secure.
- Consult an Expert: If you are unsure about installation or usage, consult a qualified electrician.
- Maintenance and Safety: Disconnect the product from the mains and allow it to cool for at least 10 minutes before performing maintenance or adjustments. Regular maintenance is recommended to keep the product in good condition.
By following these instructions, you can ensure the safe and effective use of your product.
This guide assumes that you are installing your wall light on a brick wall and that the wiring has already been prepared for connection to the outdoor light.
Preparing the Light
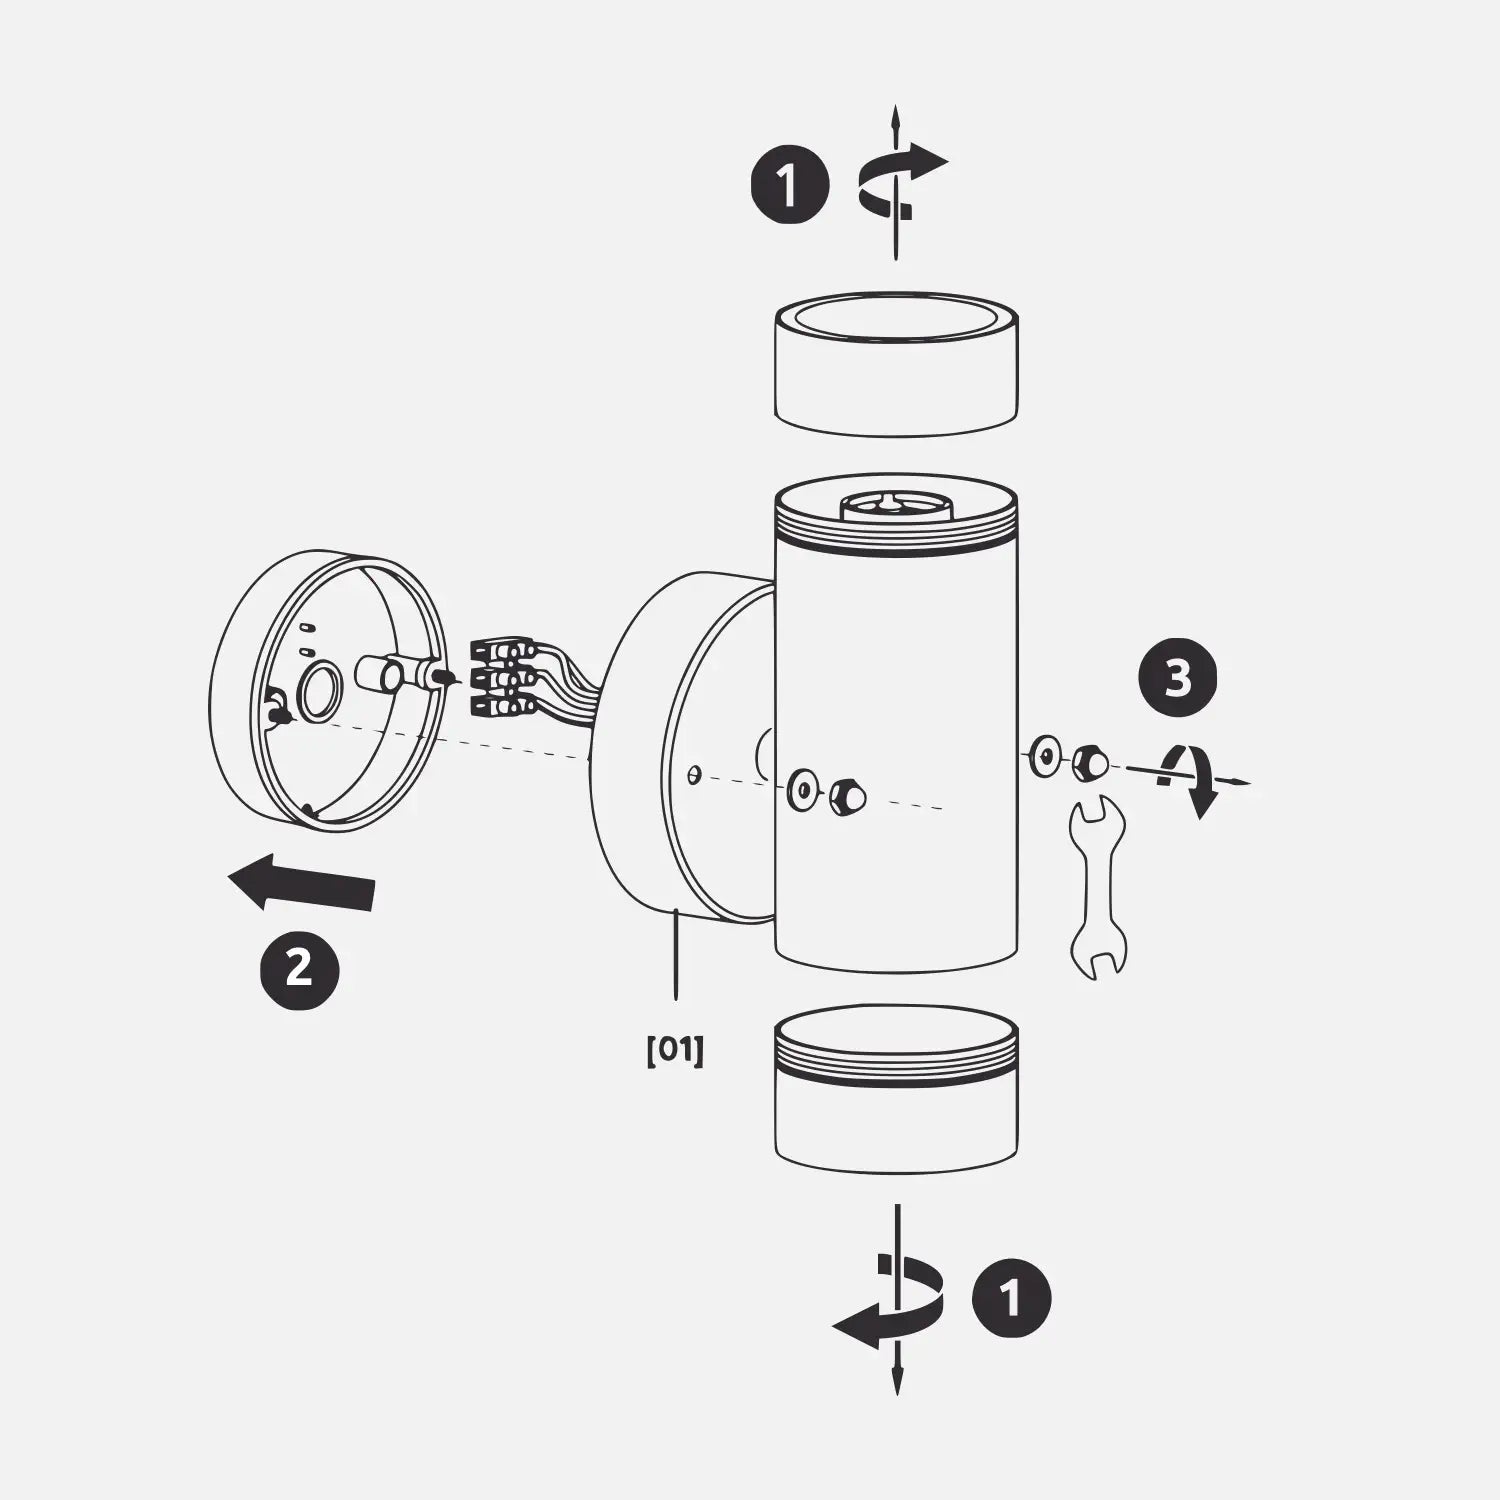
- Remove the caps from the top and bottom of the light to insert the bulbs or replace them as needed in the future.
- Detach the bracket from the back of the light, and if the white junction box is connected to the bracket, gently pull it to separate them.
- Loosen and remove the two bolts located on either side of the light’s base; these will be reattached during the final installation step.
Drilling the Wall Holes
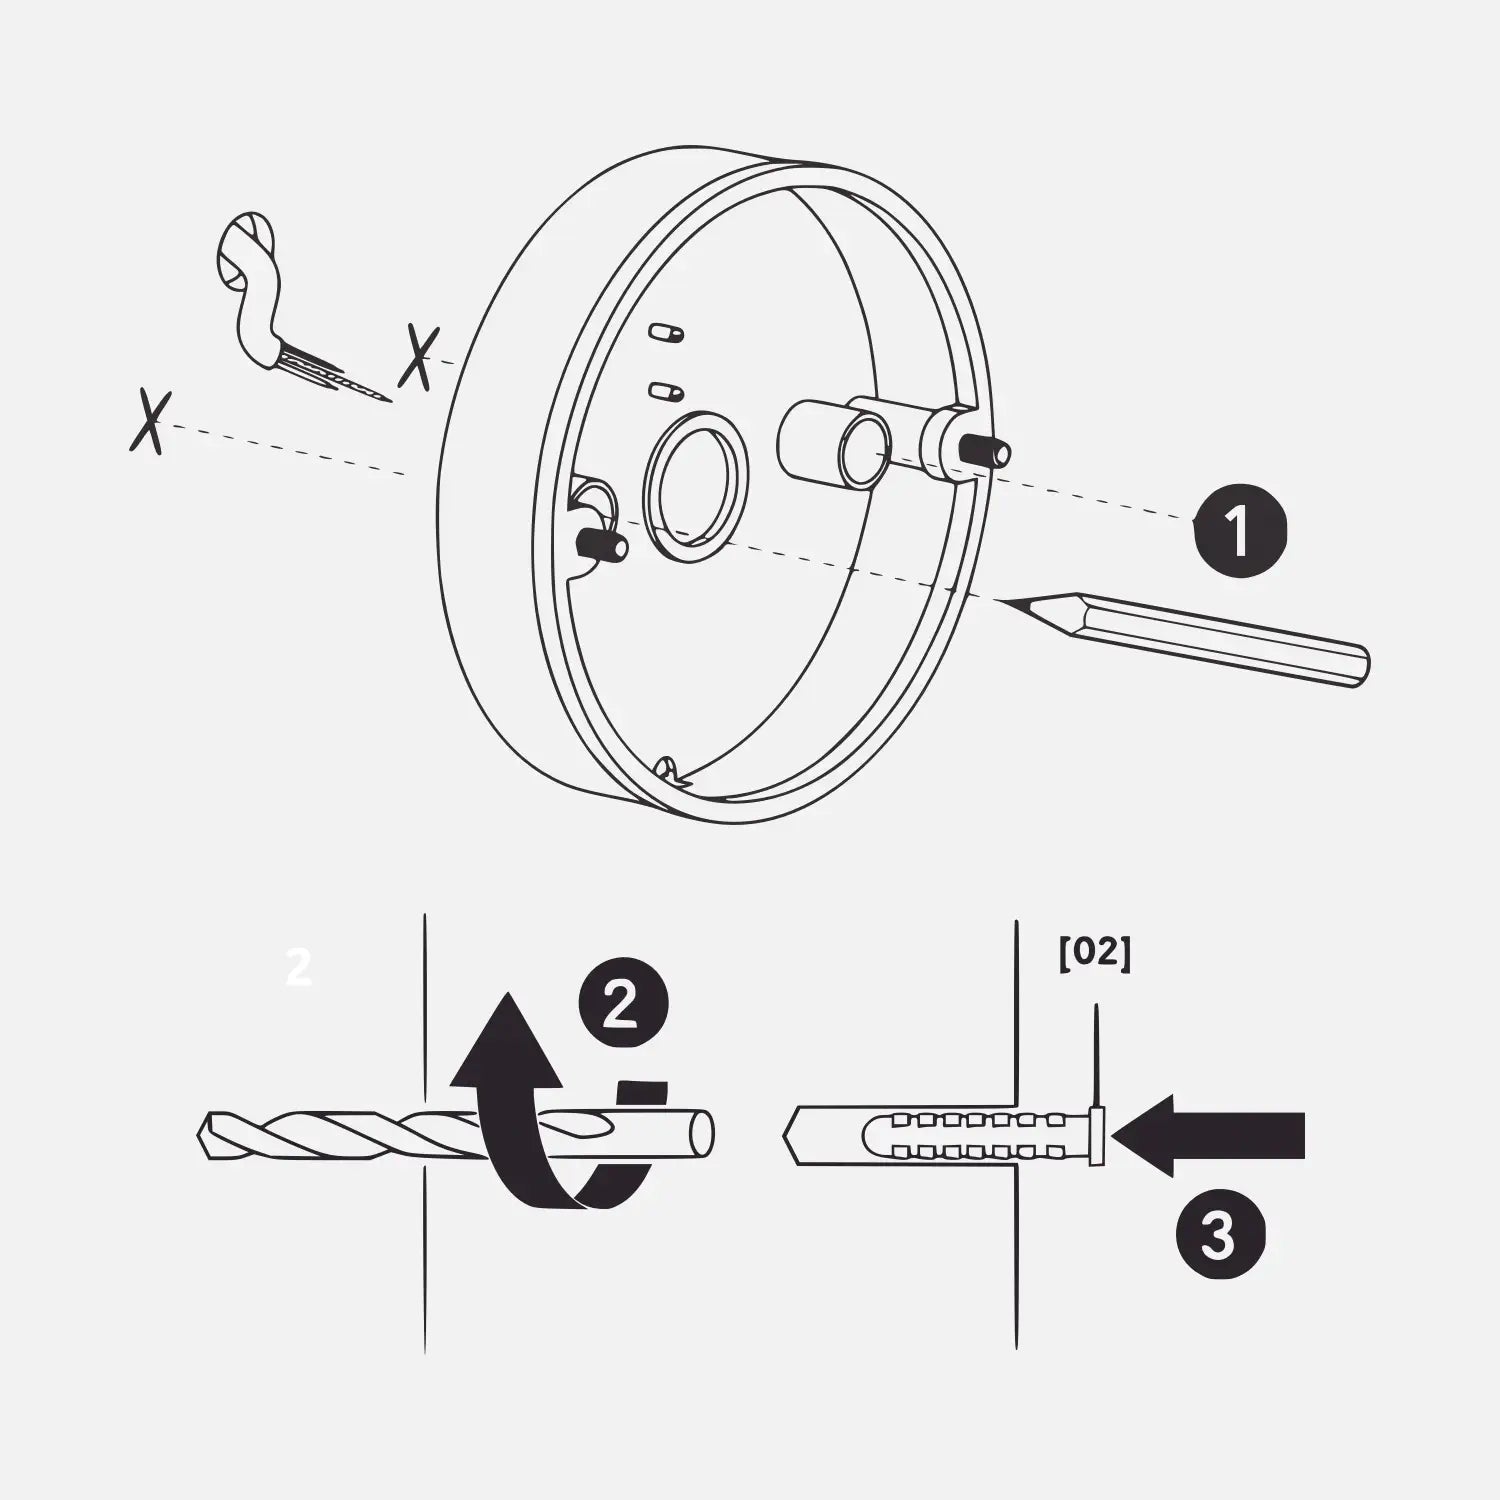
- Position the bracket on the wall where you plan to mount it, and use a pen to mark the locations where the holes need to be drilled.
- Prepare your electric drill with a 6mm masonry drill bit and drill the two marked holes.
- Insert the wall plugs into the drilled holes, ensuring they sit flush with the surface of the wall.
Preparing the Bracket
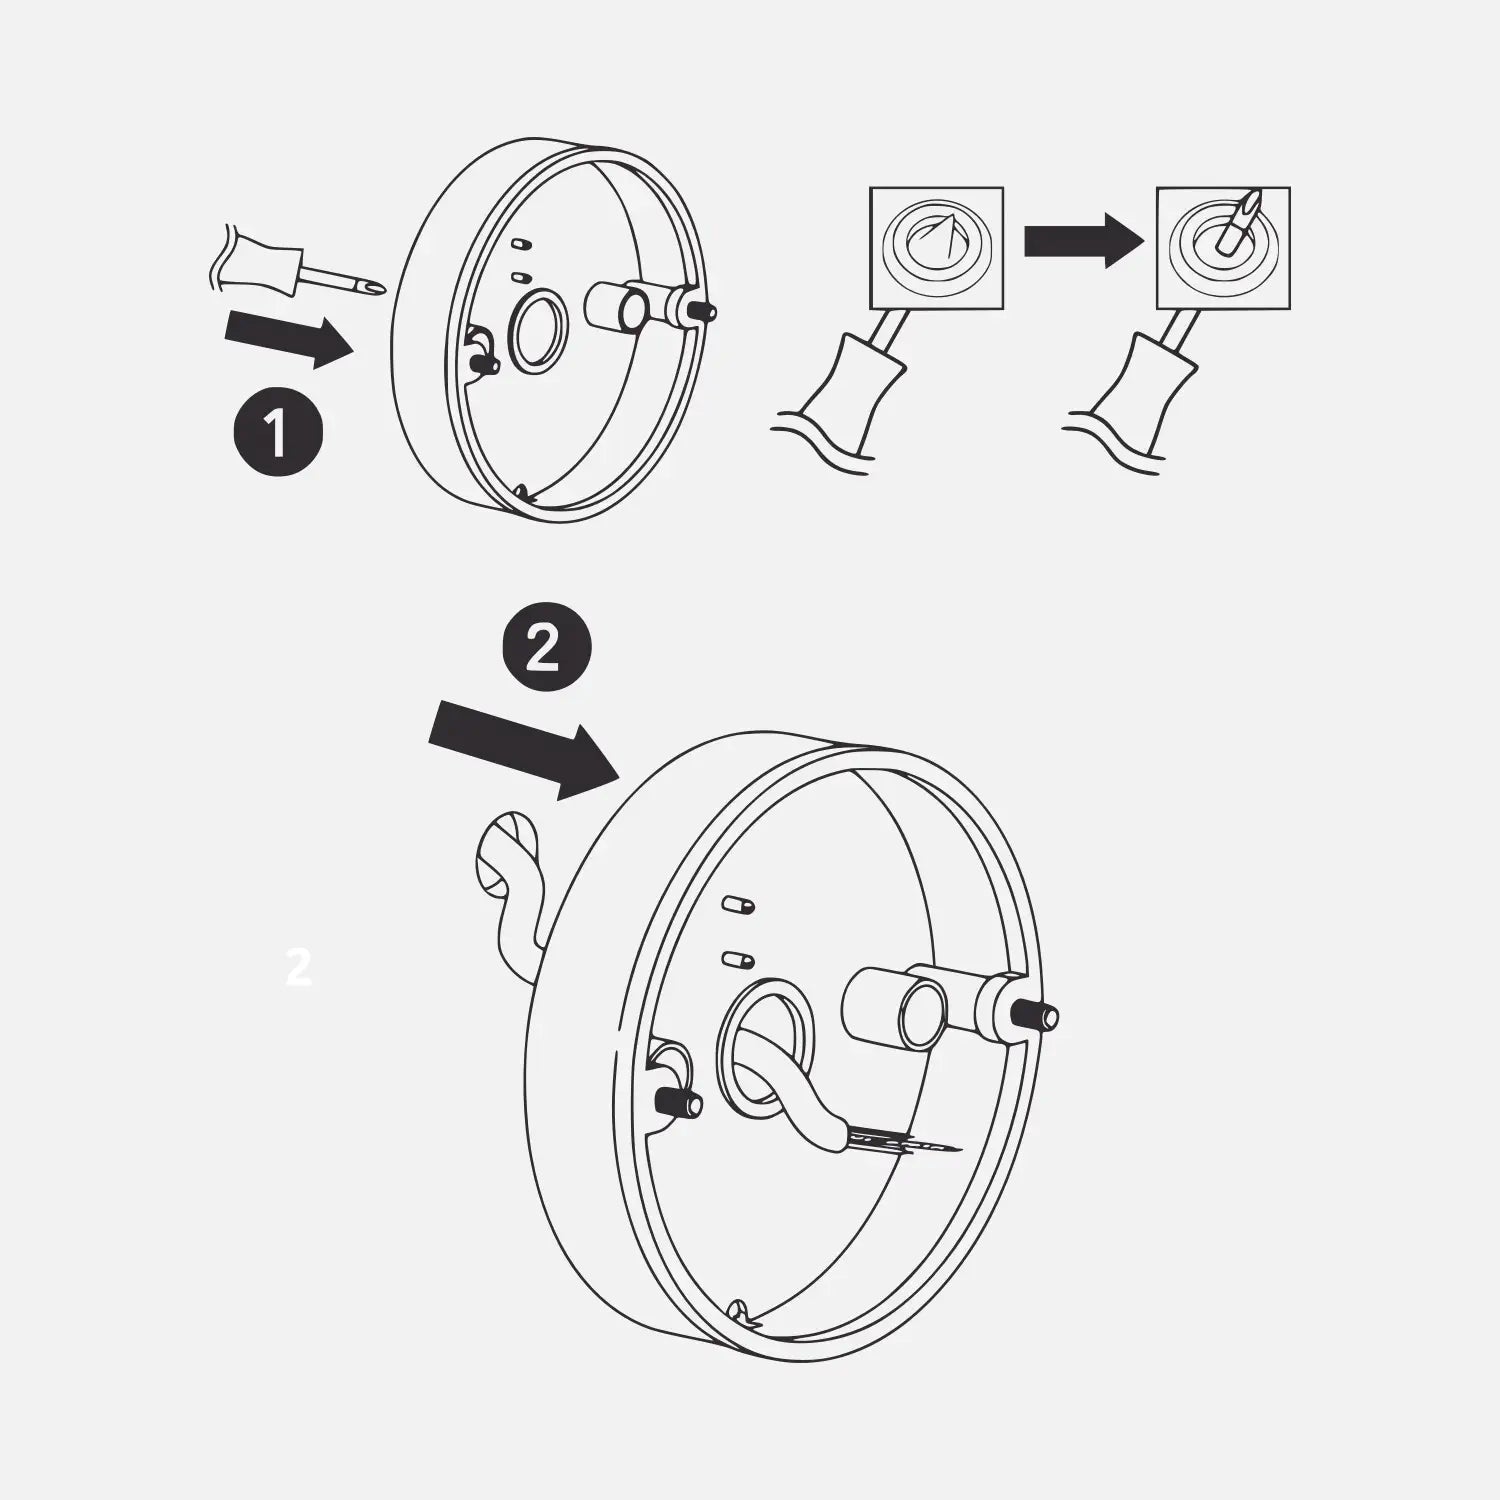
- Use a screwdriver to create a small opening in the silicone seal at the centre of the bracket.
- Thread your wiring through the newly-made hole.